Replacing a toilet seat is not the hardest task to have to handle around the home, and while you can call in a plumber or handyperson to take care of it, it is also something you could try yourself. Toilet seats do not last forever, sometimes they crack, sometimes the hinges rust or come off, sometimes it becomes unstable to sit on, and sometimes you just want a new seat! In how to fit a toilet seat all it takes is unbolting the old one, taking care of it and bolting on the new one. It is something you should get done in half a day or less depending on your DIY experience.
Step One – Selecting a new toilet seat
- Measure your toilet bowl before you set out to buy anything as while there is a standard size there are different toilet types and you need to be sure about yours. How to replace a toilet seat means measuring its length, width and checking the measurements between the holes in the toilet bowl.
- Decide on the style of toilet seat you want taking a look at the type of toilet you are buying it for. There are a lot of brands to choose between and colours also. You might also want to think about whether to get one that has special pads to prevent slamming.
- Collect the materials and tools you need. This will include pliers or an adjustable wrench, a small hacksaw possible, some oil or WD-40 and a flathead screwdriver.
Step Two – How to remove a toilet seat
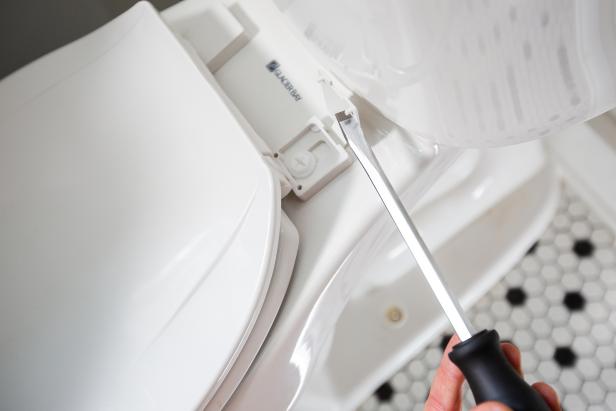
- If there are bolt caps take them off, they are plastic caps on each side of the seat where the toilet hinges attach. You can use the screwdriver to lift them off. If you just see bolts then there are no caps to remove.
- Using your adjustable wrench you can now loosen the nuts. Looking under the edges of the bowl you should see the bolts going down and then nuts holding them, one on each side. Turn the nuts to loosen them.
- Next on how to fit a toilet seat is to remove the bolts completely, you may need to use a screwdriver at the base of the hinges. If there are washers between the bowl and nut take those off as well. If the bolts are stuck that is where the WD-40 comes in to play. If that does not work try using a wire brush to scrub off the grime, and if they are still stuck, use the hacksaw to cut them.
- Chuck out the old seat and bolts and nuts.
Step Three – Installing a new toilet seat
- After you have worked out how to remove a toilet seat you need to install the new seat. Place the new seat into the right position exactly how the old seat was positioned with the hinges over the place. You should nuts and bolts with the seat and there may also be plastic caps to go over the bolts. Unpack those ready.
- Slide the two bolts down into place in each hinge and into the toilet bolt holes beneath. You can drop them without worrying as the head of the bolt will ensure the bolt will not drop all the way through.
- Now take a nut and thread it onto a bolt clockwise by hand and tighten. Then use an adjustable wrench to finish tightening. Then do the same for the other nut and the toilet’s other side. If your toilet seat had washers put those on before the nuts. Put the two caps on the ends of the bolts if there were any, they just snap into place.
- If your toilet does not have bolts through the hinges it might be you put the bolts into the holes and then fix them in with the nuts. In this case, for how to replace a toilet seat the toilet seat hinges then snap on or slide onto the bolt heads.
Conclusion
If you have any doubts about replacing a toilet seat yourself or what type you have, just read the instructions that come with it and that will guide you. Older seats are harder because of the grime, rust and such that can build up.


